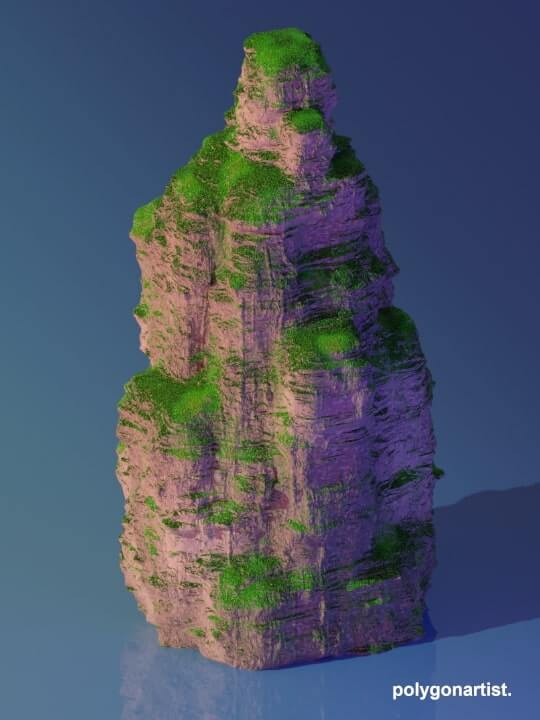
In this Blender 3D tutorial, you will learn how to make procedural cliffs in Blender. We will be using non-destructive modeling methods. This tutorial will use Cycles render engine to render the final results. No 3D sculpting required!
The project file for this tutorial is available on Gumroad.
Table Of Contents
- Reference Study
- Modeling
- Material Setup
- Displacement Setup
- Displacement Node Group
- Final Displacement Setup
- Cliff Base Colour
- Separate XYZ
- Procedural Grass Shader
- Final Result
Reference Study
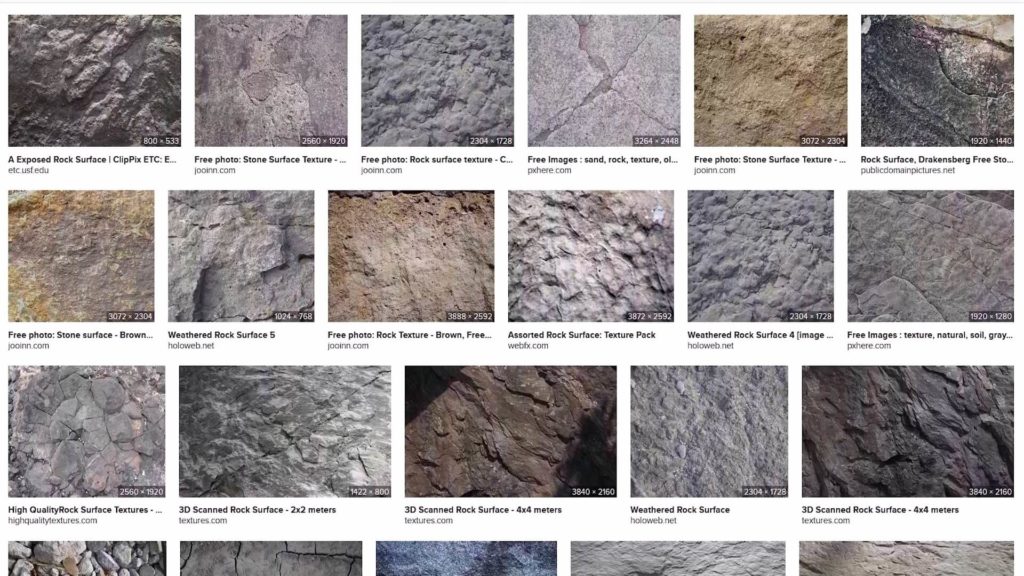
Before starting anything 3D related inside Blender, it is always a good practice to find reference images of what you intend on creating in 3D. In this case, we’re creating procedural rock/cliff elements therefore a good idea is to research different types of rock surfaces. Above is a simple web search for ‘Rock Surfaces’ via DuckDuckGo.

Once you find a reference that you like, its time to analyse and breakdown. The above image is a royalty free image from Unsplash which you can find here. Specifically, the goal here is to breakdown the primitive shape of the structure that we intend to model. In addition, we also want to understand fundamental colour structure of our cliffs so we can replicate them procedurally in Blender. This tutorial will not cover any creation of 3D foliage. However, if you want to create trees refer to How To Make Realistic Trees In Blender. Consequently after analysing of the reference material, it’s time to start the creation of our 3D procedural cliffs in Blender.
Non-Destructive Cliff Modeling

In the reference breakdown above, it’s established that the core structure of the cliffs i made up of box-like shapes. Therefore, inside Blender, Shift + A and add in a Metaball → Cube.

Scale the Metaball down to a rectangle and an appropriate scale. We’re not working with real word scale at this point so a manageable scale is highly advised while intially modeling the base geometry. On the whole, this Metaball cube will be the base of our procedural cliff geometry.

Before going any further, it is best to set the rosultion for the Metaballs we will be using. Hence, select the Metaball Properties tab. Accordingly, it’s time to adjust the resolution of our mesh.
- Resolution Viewport → 0.2m
- Render → 0.15

In summary, the modeling process for our base cliff mesh is very basic and is akin to basic box modeling process. Essentially we’re using the Metaballs cube we created and consequently duplicating, scaling, repositions and adjusting the rotation of the Metaball cube as you can see above. Similarly, it’s important create a more ‘Random’ look in this process as the final results may not look realistic.
Procedural Cliffs – Material Setup

While the Cliff mesh is selected, go to the the Shader tab in the outliner and create a new material. Give this new material name so it’s easier to organise.

Additionally, head over to the Render Tab in the Properties panel and set the render engine to Cycles. At time of writing this tutorial, Blender’s EEVEE render engine does not support phycal based rendering. Hence this setup will only work with Cycles render engine to produce procedural cliffs in Blender.
⚠️ This is an important step.

Switch to the Shader Editor window in Blender. Before building the shader setup, it is a good idea to make space in the shader editor.
💡 Tip: Use CTRL + SPACE keyboard shortcut to switch between full screen modes in Blender.
Procedural Cliff – Displacement Setup

Use the SHIFT + A shortcut key and add the following Shader nodes:
- Input → Texture Coordinate.
- Vector → Mapping.
- Texture → Musgrave Texture.
- Converter → ColorRamp.
⚠️ Set the Musgrave Texture node to Ridged Multifractal.
Connect the nodes as shown above. These nodes are going to control the displacement for our procedural cliff shader. Although, these nodes cannot be be plugged into the displacement as they are right now. A Therefore, a displacement node required to transfer the values from these nodes to displacement data.
💡 Tip: If you have NodeWrangler activated. Select the Musgrave Texture node and press CTRL + T keyboard shortcut in Blender to add Texture Coordinate and Mapping node.

Add a displacement node, SHIFT + A → Vector → Displacement.
By the same token, connect the output from the ColorRamp node and link it to the Scale input of the Displacement Shader. Likewise, these are the values in the Displacement node:
- Height → 1.5
- Midlevel → 0.0

- Click and select the Displacement node.
- Press N key to show the node settings sidebar.
- Select the Options Tab in the settings sidebar.
- Set the Displacement to Displacement an Bump.
⚠️ This is an important step, without this setting the procedural cliffs shader will not work correctly.

Musgrave Texture Values:
- Scale → 4.5
- Detail → 15
- Dimension → 0.6
- Lacunarity → 2
- Offset → 0.2
- Gain → 40
Procedural Cliff – Displacement Node Group

Duplicate the following nodes:
- Texture Coordinate
- Mapping
- Musgrave Texture
- ColorRamp
💡 Tip: Use the cursor to select the nodes then use SHIFT + D keyboard shortcut to duplicate the select nodes.

In addition, mute the selected nodes temporarily by selecting the nodes shown above and them pressing the M key to mute.
💡 Tip: This helps to isolate the nodes and get better understanding of what current nodes are doing to the displacement.

Change the Texture Coordinate output from Generated to Object.

Correspondingly, change the Mapping node scale setttings:
- X: -0.3
- Y: 1
- Z: 1
Coupled with texture values for the second Musgrave Texture:
Scale → 1
Detail → 15
Dimension → 0.7
Lacunarity → 2
Offset → 0.1
Gain → 75

Finally, create a MixRGB node. SHIFT + A Color → MixRGB. Connect the MixRGB node as it as shown above.

Again, duplicate the displacement nodes setup in addition to the MixRGB shader.

Likewise, connect the MixRGB nodes as shown to complete the entire displacement node setup. To complete the displacement nodes setup, repeat the same proces once more.
Procedural Cliff – Final Displacement Setup


Finally the displacement node setup should look something like shown above. Moreover it is highly advisable to experiment with the settings shown to best suit your own project. This concludes the displacement part of our procedural cliff shader setup. However, its recommended that you adjust the values in the node setup that will correspond with your project.
Procedural Cliffs – Base Colour

To create the base colour for our procedural cliffs, add the following nodes:
SHIFT + A keyboard shortcut then –
- Input → Texture Coordinate
- Vector → Mapping
- Texture → Musgrave Texture
- Converter → ColorRamp
Connect the created nodes as shown above. Furthermore, make sure the Texture Coordinate output is set to Object. Then connect the ColorRamp output to the Base Color of Principled BDSF.

Mapping node scale values:
- X: 0.5
- Y: 5.5
- Z: 1
Musgrave Texture node values:
- Scale: 0.2
- Detail: 2
- Dimension: 2
- Lacunarity: 2

By using the + and – in the ColorRamp node, add in colour stops that best match your desired rock surface colour. It is a good practice to add multiple variation of colours so that the rock surface has a much more realistic look. As a result, this will be the base colour for our procedural cliff.

Duplicate Texture Coordinate, Mapping, Musgrave Texture and ColorRamp nodes.
SHIFT + A → Color → MixRGB. Connect the nodes as shown above. In summary, these nodes are used to create addition texture details for our procedural rock.

Change the Mapping scale on the duplicated nodes:
- X: 5
- Y: 50
- Z: 3

Procedural cliff base colour node setup.
Separate XYZ

Create the following nodes:
- Texture Coordinate
- Separate XYZ
- Math
- Math
- ColorRamp
- MixShader
Once added, combine them as shown above. Set the Math nodes to multiply. These nodes will spearate the Z axis on our cliff mesh where we will place our procedural grass texture. Henceforth, allowing us to place our grass shader on our cliff surface procedurally.
Procedural Cliff – Grass Shader

Create the following new node setup.
Musgrave Texture → ColorRamp → PrincipledBDSF.

Use the ColorRamp node to create a grass gradient.

As shown above, set the Musgrave Texture Size to 10.

Duplicate the Musgrave Texture Node and ColorRamp Nodes.

Finally, add in a MixRGB node and connect it as shown above.

Adjust the secondary ColorRamp to create more variation in the grass colour.

Set the Musgrave Texture scale to 140.

Finally, to complete our procedural grass shader setup add in the following nodes:
- Texture Coordinate
- Musgrave Texture
- Bump
Connect them as shown above.

Adjust the Musgrave nodes settings to match your scene or use the settings shown above.
Final Result

It is recommeded that you experiment with the settings used in this tutorial to best match your scene and project. The .blend file for this project is available on Patreon.
If this post was helpful, please consider becoming an email subscriber 💌 and help support future content. 🠗🠗