If you’re looking for an alternative to using super expensive HDRI sky environments (which we covered how to use in blender), you might be interested in creating a fully procedural sky inside Blender. Although there are free HDRI environments such as HDRIHaven they may not offer exactly what you’re after. Henceforth, by creating custom procedural sky, it allows greater control of how the final scene will look in Blender.
Creating World Shader
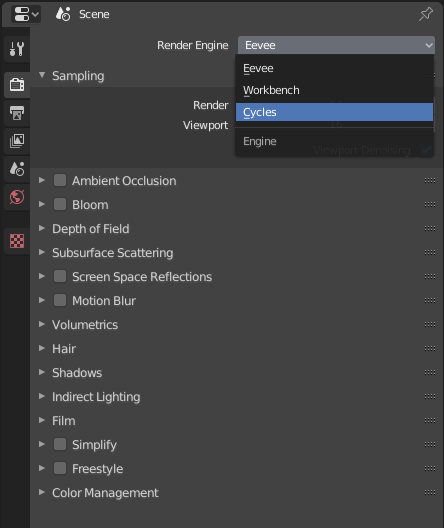
Firstly, go into the Render Settings tab in Blender and set render engine to Cycles.
Delete everything from the scene by selecting everything (A key) then delete (X key). Once, everything is deleted add in a new camera to the scene. In the Object Properties panel set the Camera Rotation as: X – 90, Y – 0, and Z – 0.

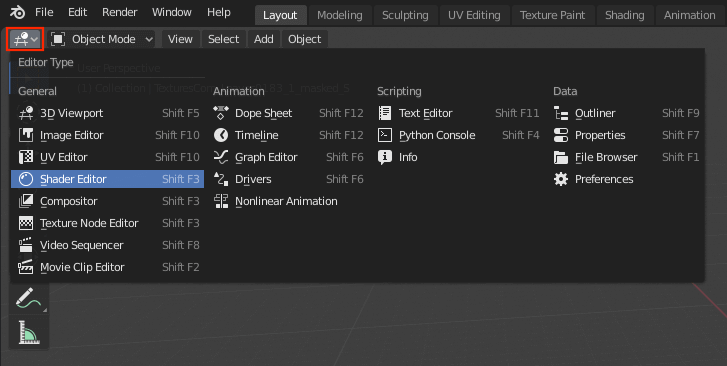
Go into Shader Editor.
Set the Shader Type to World. This will enable us to modify the procedural sky texture.

Now that we’re in the Shader Editor, we need to add in Texture Coordinate, Mapping, Gradient Texture, ColorRamp and Hue/Saturation nodes. By doing this, we will have to ability to customise the look of our procedural sky. To add nodes in Shader Editor use SHIFT + A keyboard shortcut then:
- Input > Texture Coordinate.
- Vector > Mapping
- Texture > Gradient Texture
- Converter > ColorRamp
- Color > Hue Saturation
When the nodes have been added use the node setup as shown below.

Go into Camera View by using 0 from number pad and into rendered view by using Z key then selecting rendered from the Pie menu. Use the settings shown below for the Mapping Node. This will set the horizon for our sky.

Next we need to edit the ColorRamp. Add in the color stops as shown below and adjust the color settings.
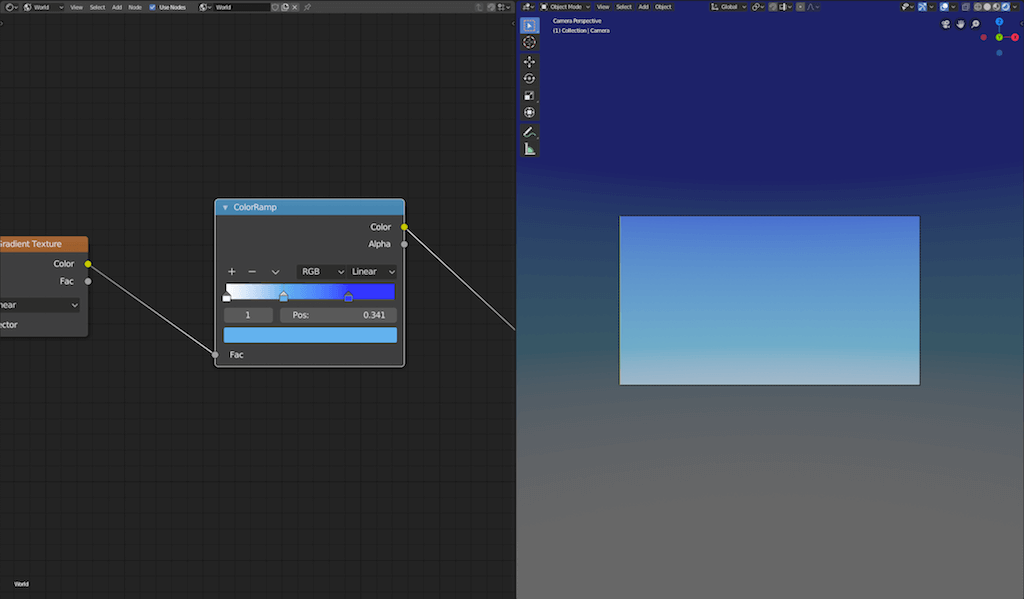
Set the ColorRamp Interploation mode to Bspline. This will give a smoother blending between colors.

Generating Clouds
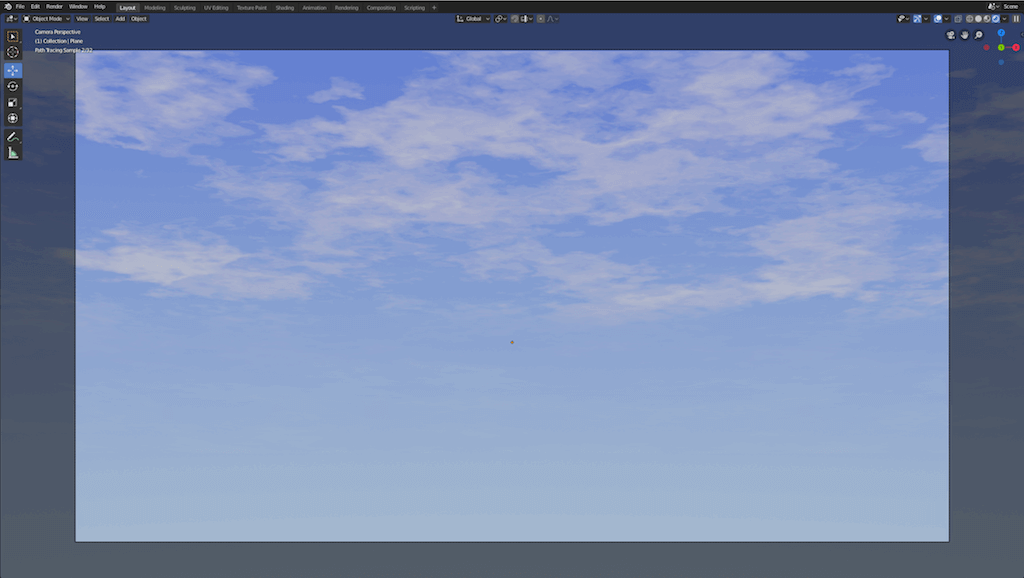
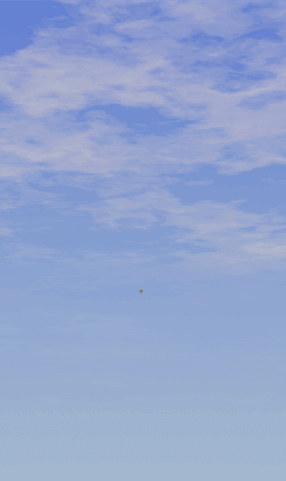
Finally, it’s time to create some clouds! We’ll. be using a 3D plane and some noise texture to generate our clouds. Head over to the 3D view, then SHIFT + A > Mesh > Plane to add in a 3D plane. Place it above the camera at an angle as shown below.

In order to create our clouds we need a new. material. Hence create a new material for this plane and name it Clouds and head over to the Shader Editor window to build our sky clouds material. Don’t forget to change the Shader Type to Object from World.
Delete the default PrinicpledBDSF node and use the node tree as shown below for the Clouds material.
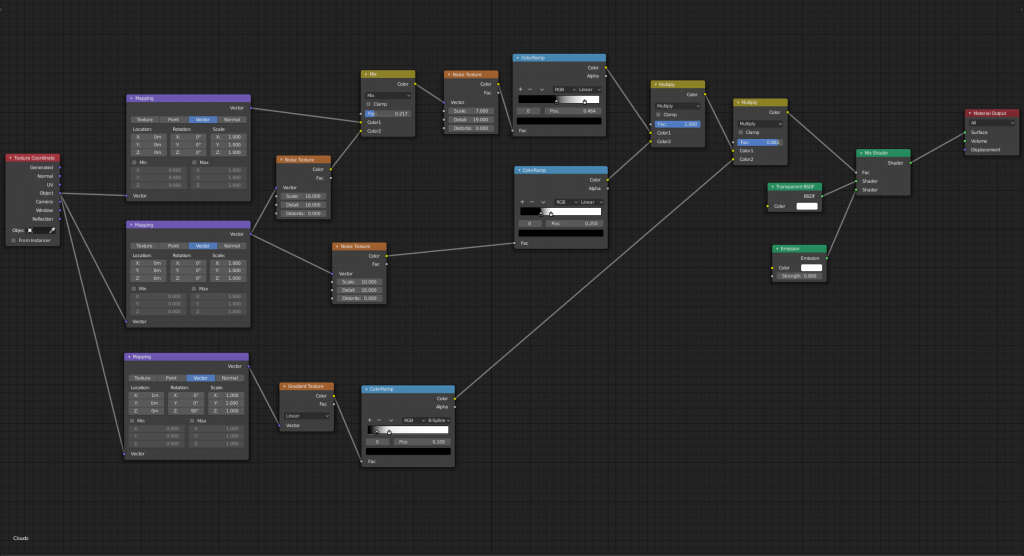
Adjust the Clouds shader settings as required. Finally, you should now have a fully procedural sky environment inside Blender!