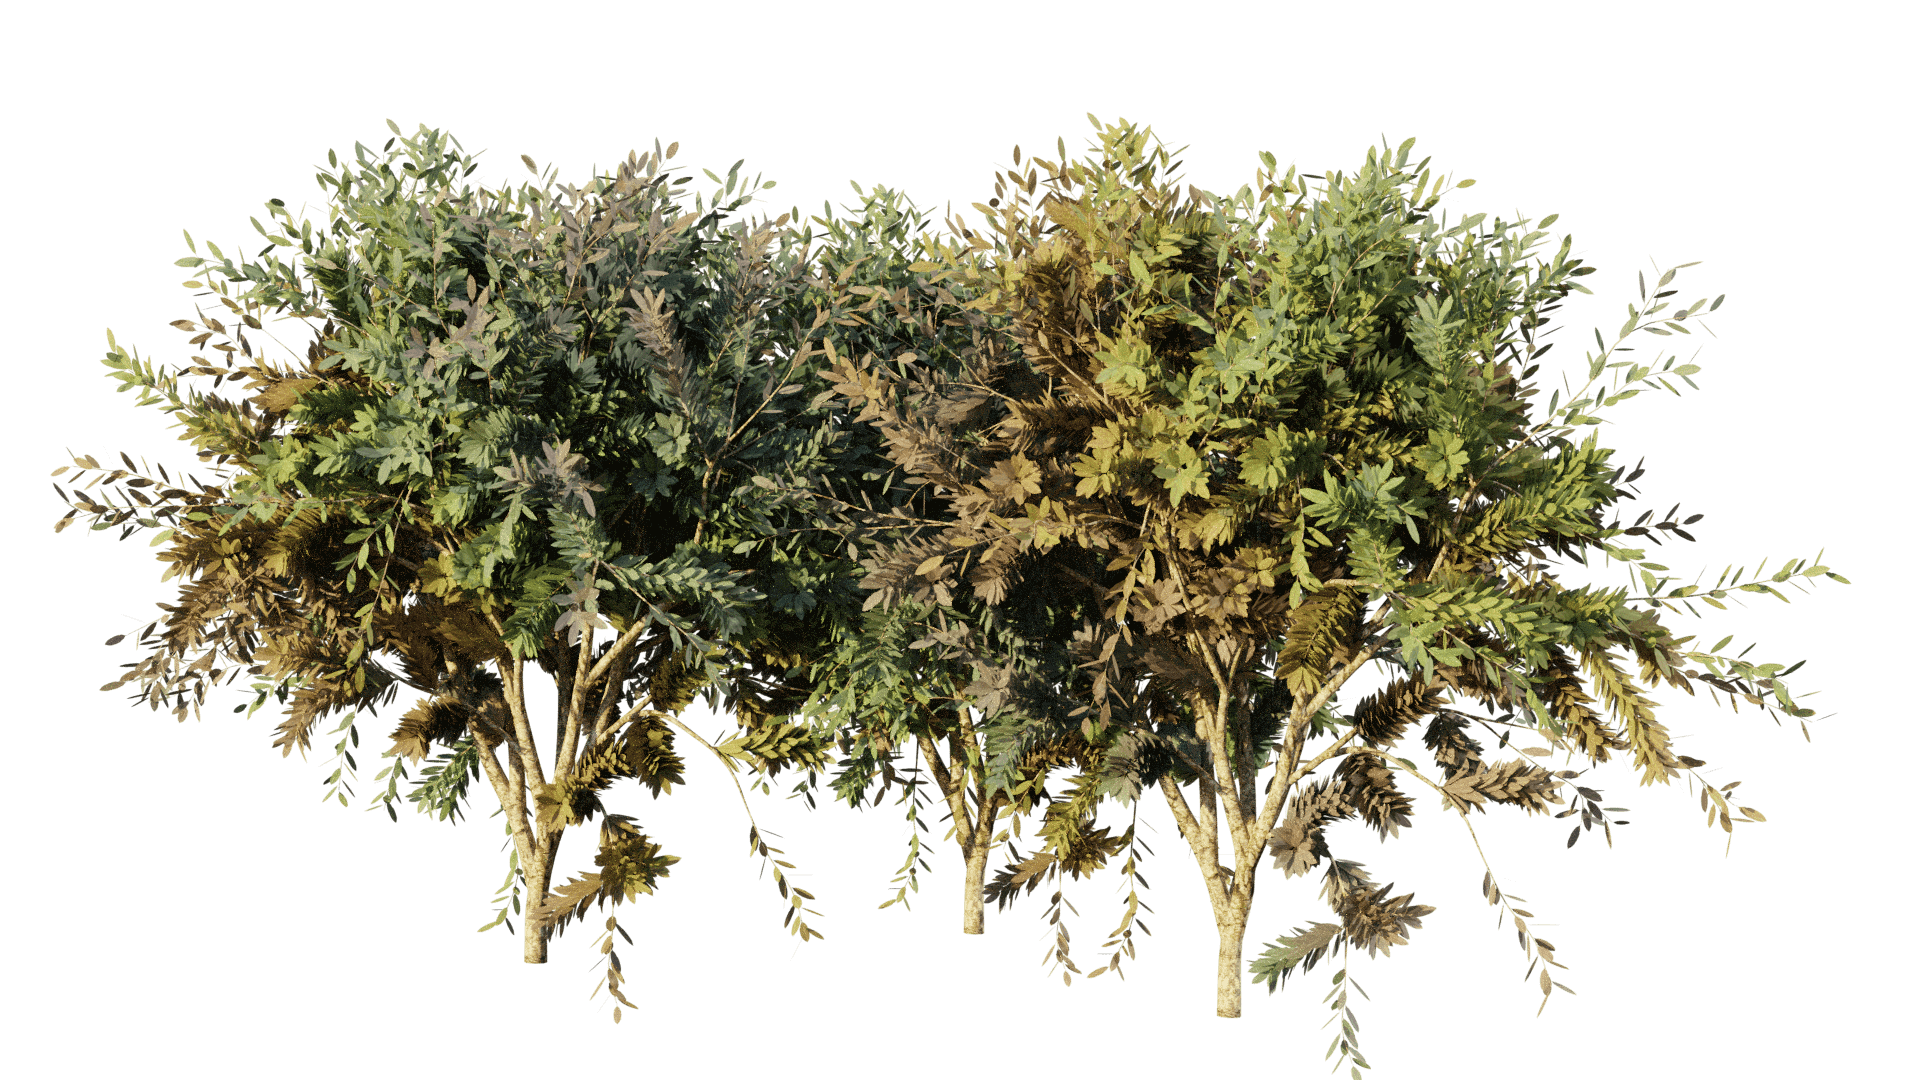
Want to create realistic trees in Blender? In this post you will learn to model and texture a fairly realistic trees inside Blender using free textures. We’ll be using the Sapling Addon which is free inside of Blender to model our tree and leaves then manually texturing them.
1. Enabling Sapling Add-on
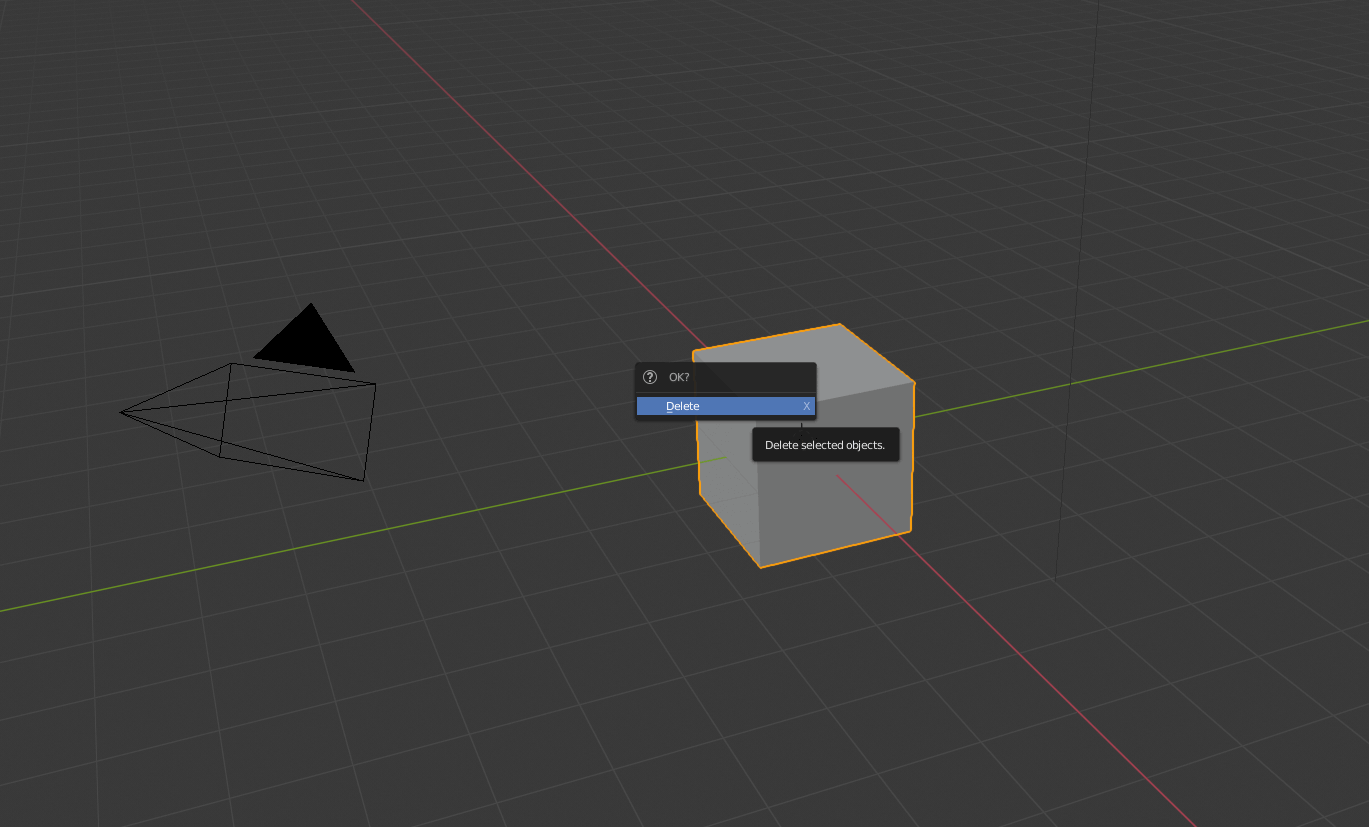
Hit the X keyboard shortcut and delete the standard cube. While at it, also delete the light as we’ll be setting up our own lighting for the scene.
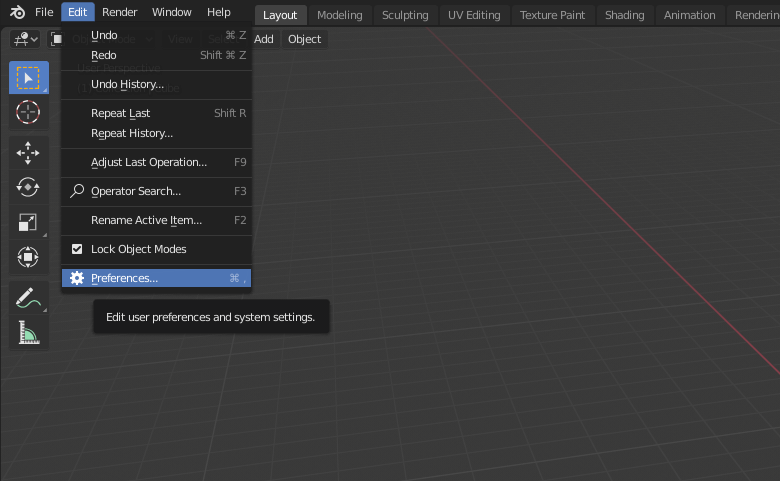
Go to Blender Preferences.
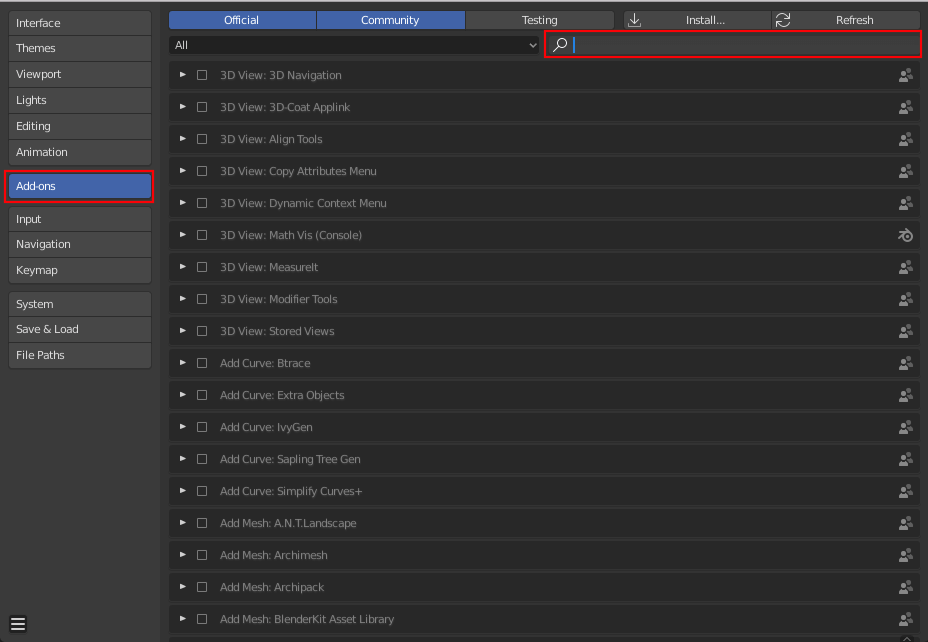
In the Preference window search for Sapling Add-on and enable it. Make sure to save your User Preferences.
2. Tree Geometry Creation
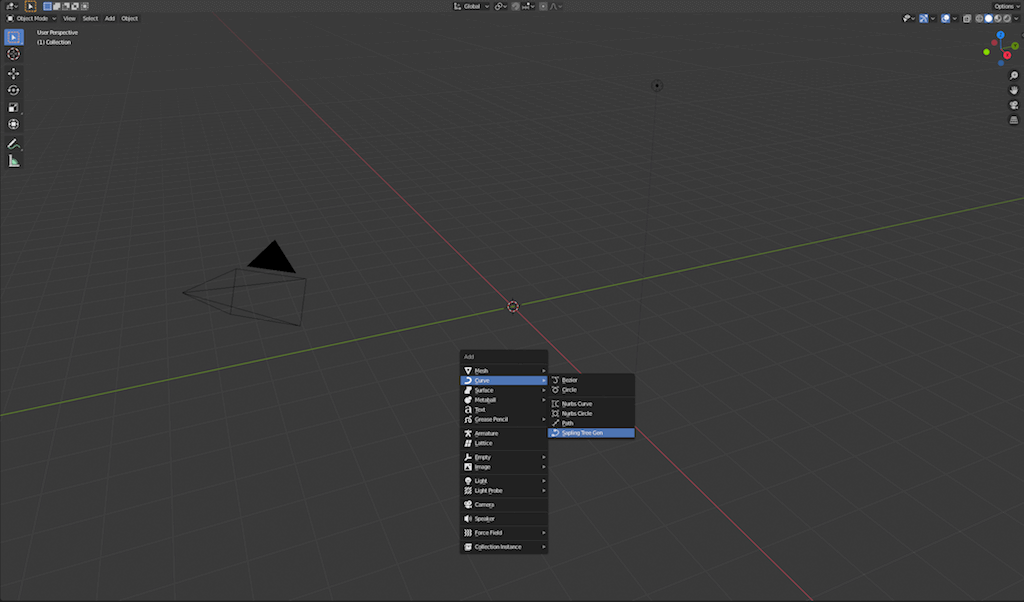
In your viewport, Shift + A and got to Curves > Add Tree. This will add a spline tree which we are going to use as a base for our tree.
Now we’re going to edit the look of the tree. To do this we will be using the tree menu to adjust the curve settings.
💡 Tip: Make sure not to click anywhere in the viewport as this will get rid of the settings menu for the tree curves. However, if you do accidentally lose the settings menu, use the F9 key to bring it back.
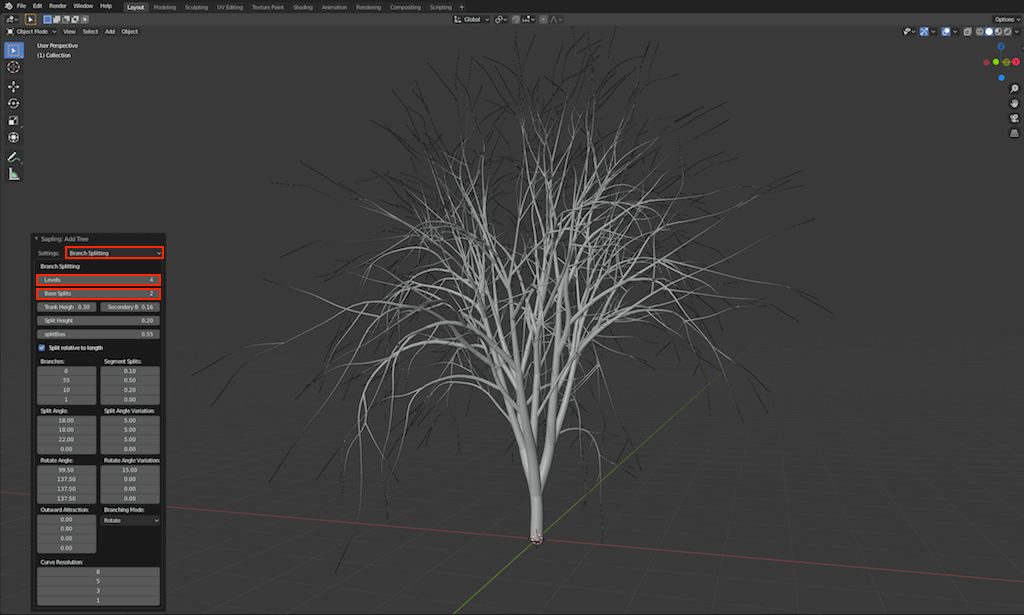
In the geometry settings, set the bevel resolution to 3. You can go higher than 3 but we’re going for a low poly tree for asset creation. While at it, also set the scale to 6 to increase the size of the tree.

Now head over to branch splitting menu. From the Brach Splitting menu, set the levels to 4 and base splits to 2. Everything else can be set at default value.
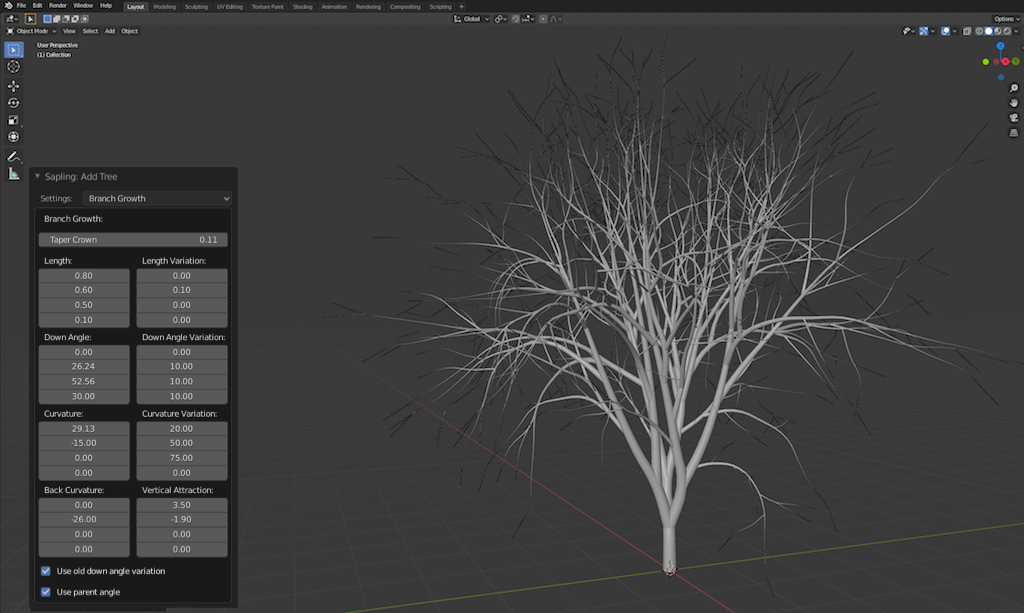
In the branch growth menu, use the settings show below.
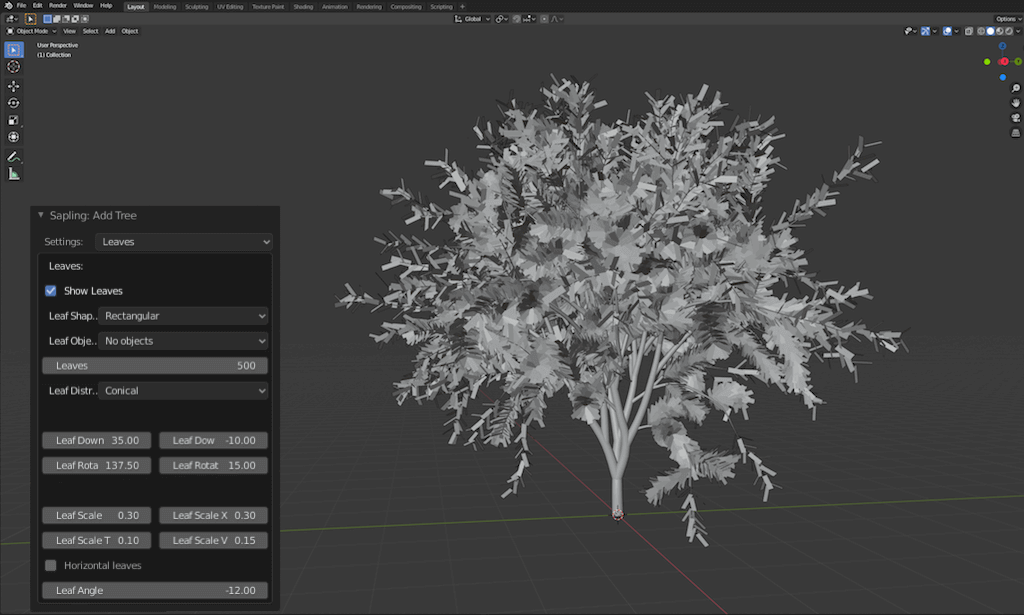
We’re going to leave pruning option alone. Let’s move straight into the leaves section! The settings we used are shown below.
3. Convert Tree To Polygons
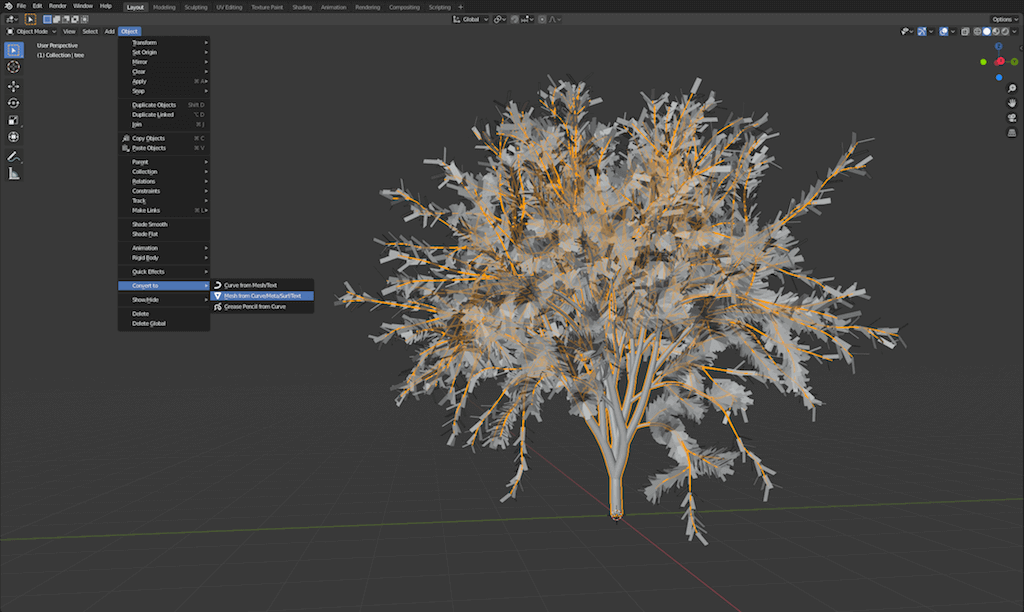
We need to cconvert the tree trunk from a curves to polygon mesh in order to be able to texture it. Select the tree trunk mesh by left clicking, select Object > Convert to > Mesh from Curves. This will convert our curves mesh to polygons.
4. Leaf Material Setup
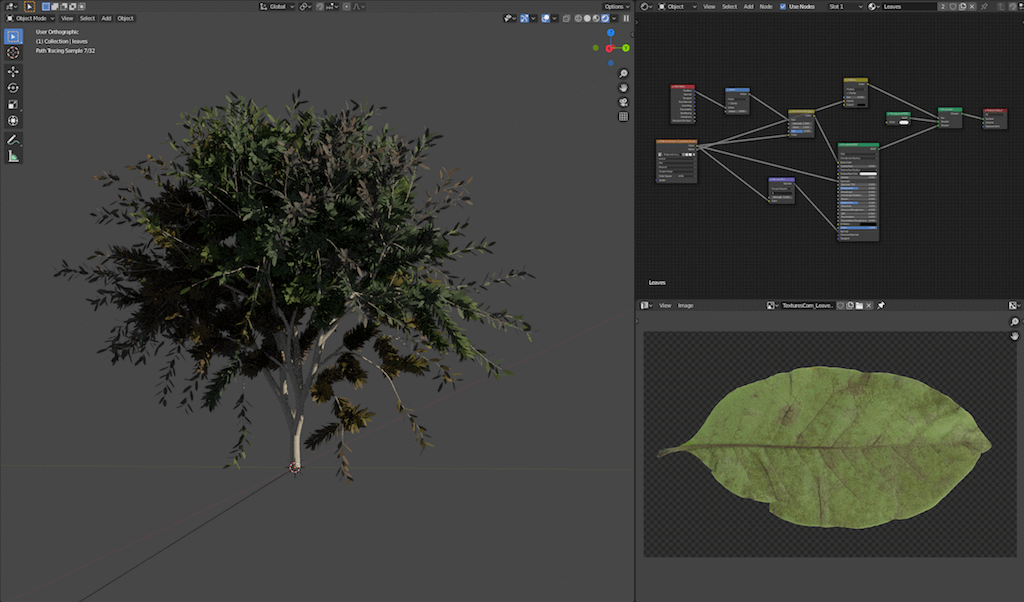
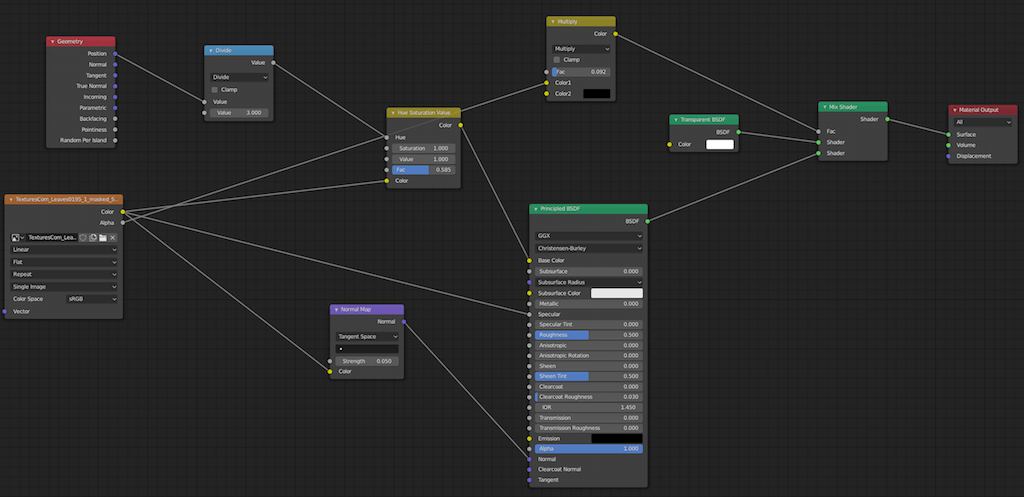
Time to create materials for our tree. Before doing so, make sure that you have selected cycles render engine as that’s what we’ll be using to render our tree. We used simple leaf texture from cgtextures.Com, feel free to use any textures with an alpha background. If you don’t know how to add alpha maps to textures then read How To Use Alpha Maps In Blender. Sapling add-on will automatically create UVs for the tree leaves mesh, hence all we need to do is apply a image texture and a few adjustments.
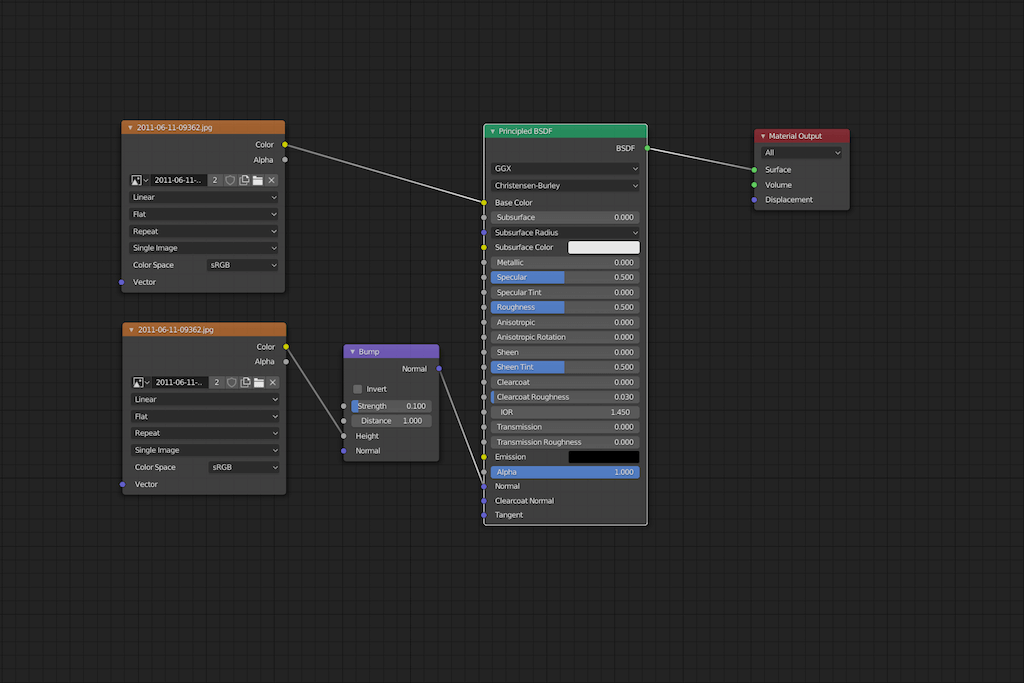
Leaf texture node setup.
💡Tip: To add realism to your tree model, it is a good idea to use double sided leaf texture. How to use double sided textures in Blender 2.8+ will teach you how. For the sake of simply we have not used double sided textures in this article.
5. Tree Bark Material Setup
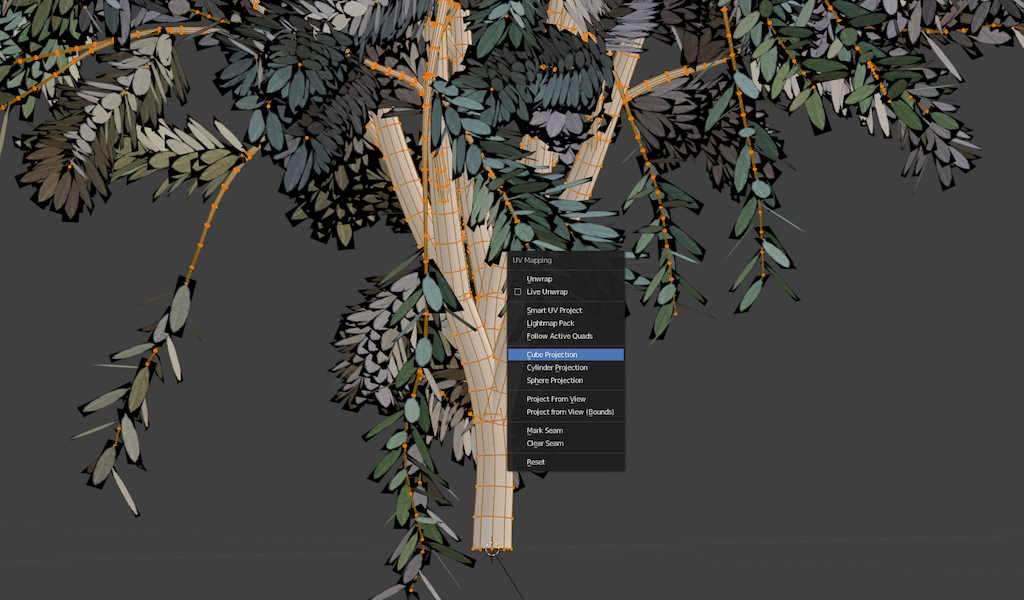
Select the tree trunk and use TAB key to enter editing mode. A Key to select all faces and U key to unwrap. We’re going to use Cube Projection as this seems to yield the best results with minimal effort.
We’re using a simple bark texture that can be found at cgtextures.com. Apply this texture to a new material slot and assign it to the tree trunk mesh. In the UV editor, select all section and use S key to scale the UVs. Scale until the texture looks about right in the rendered view. You may need to rotate the UVs, in that case just use the R key.
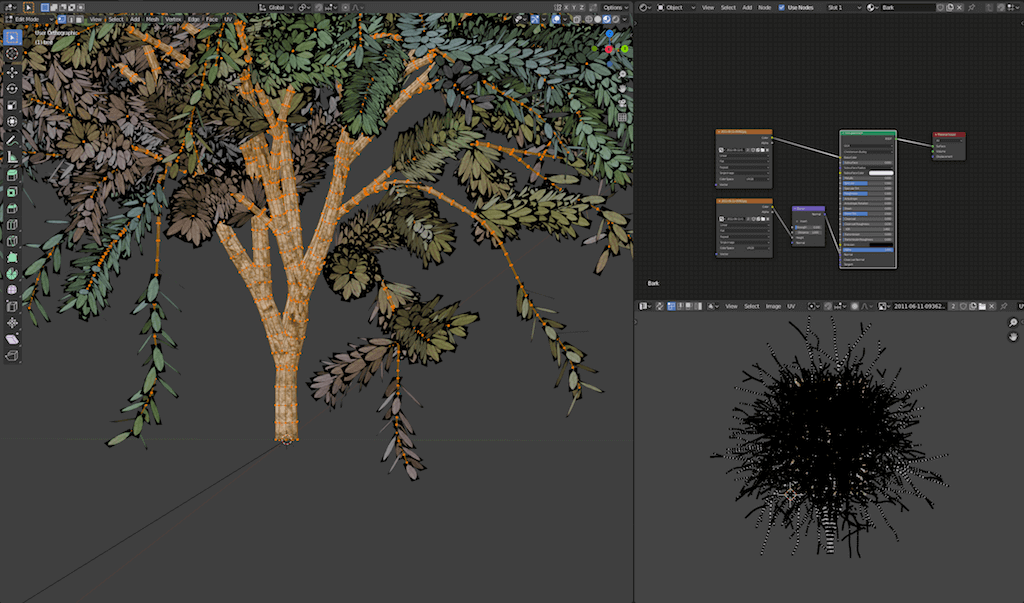
Bark texture node setup.
Now you should have a fairly realistic looking tree that you have created inside blender!
To create a more realistic lighting, add a HDRI environment map to your scene. You can learn more about adding HDRIs to your Blender scene here.