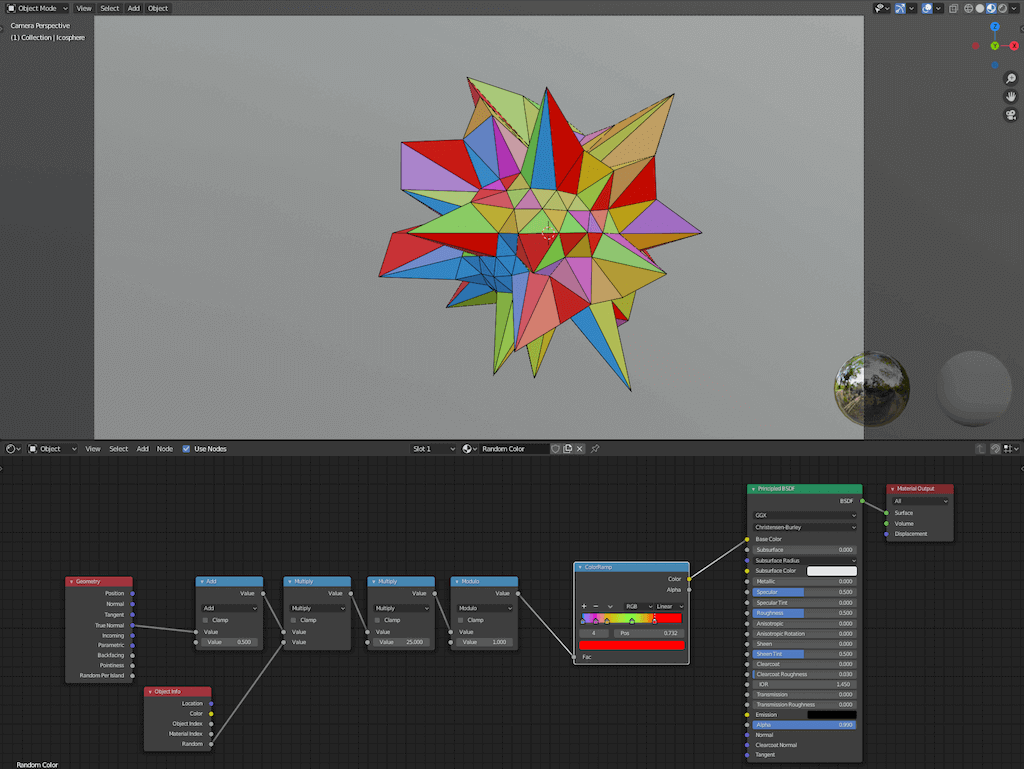
In this Blender quick tip tutorial learn how to assign random colors to polygon faces in our 3D geometry. To start off, have your target mesh selected and go into shading view as shown below. For this tutorial, a simple icosphere with a displacement modifier was used create an abstract shape. However, this method to assign random colors to polygon faces will work with any type of mesh in Blender 2.8+.
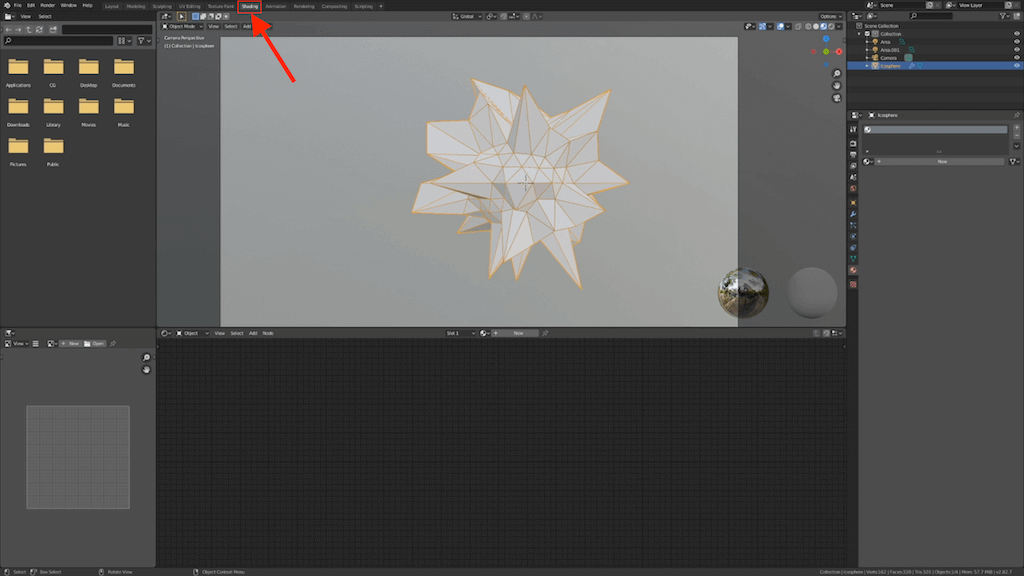
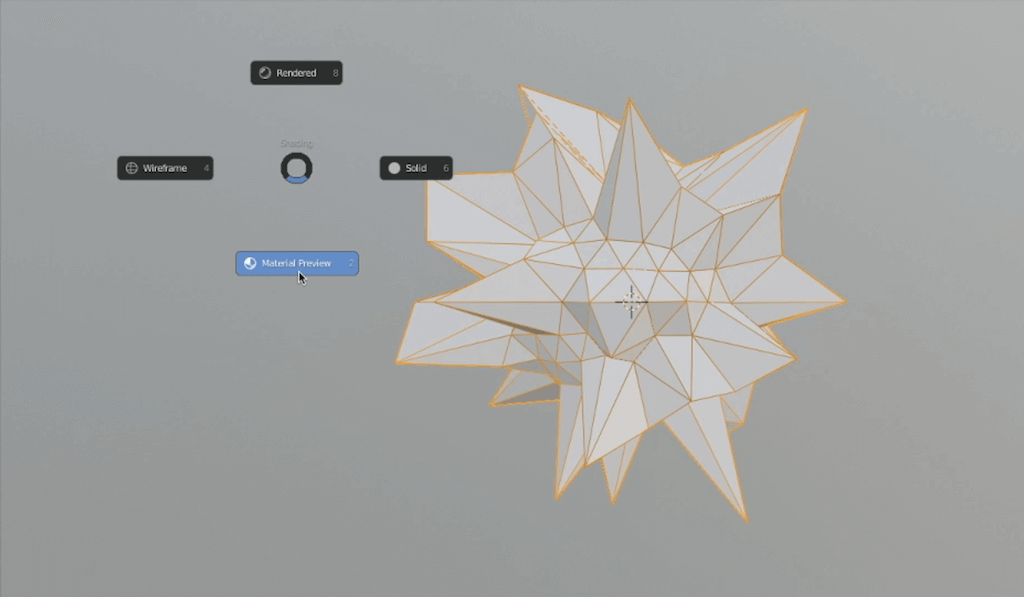
While your cursor is in the viewport, use the Z key and press 2 on the number pad to go into Material View so we can see our material while we edit them.
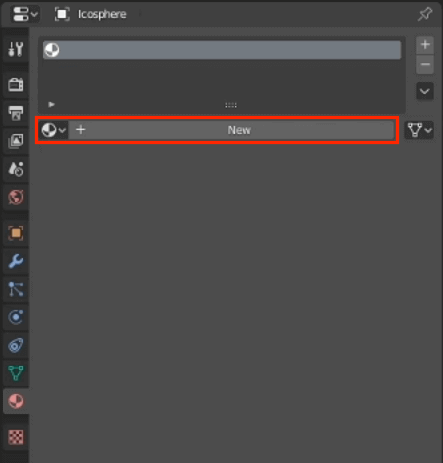
In Properties panel under materials tab, create a new material and give it a name.
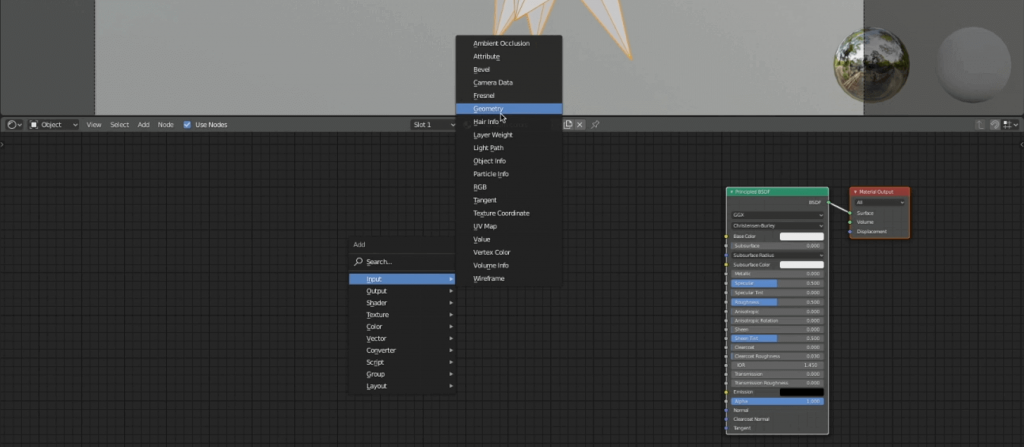
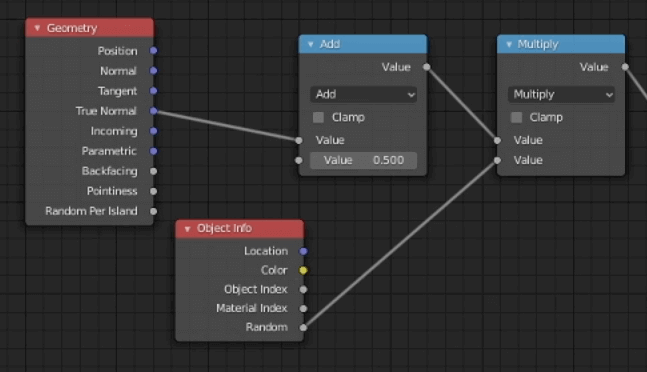
In the Shader Editor panel, use SHIFT+A key and Input → Geometry to add a geometry node.
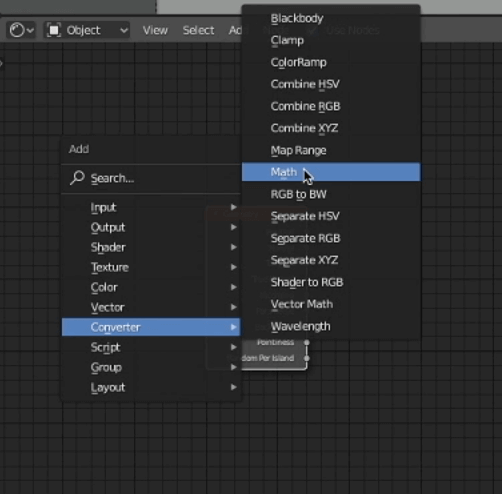
Add in a Math node by using SHIFT+A key and then Converter → Math.
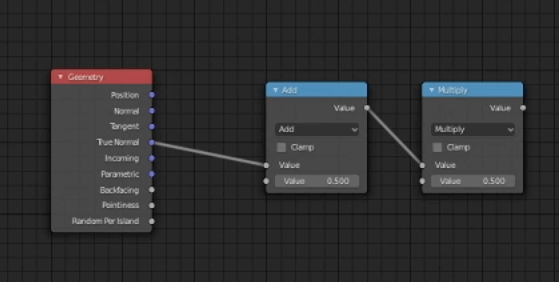
Connect the True Normals out from the Geometry node to the math node. Duplicate the math node by using SHIFT+D key and set it to multiply.
Add an Object Info node by using SHIFT + A then Input → Object Info. Connect the object info output to the value input of the Multiply node.
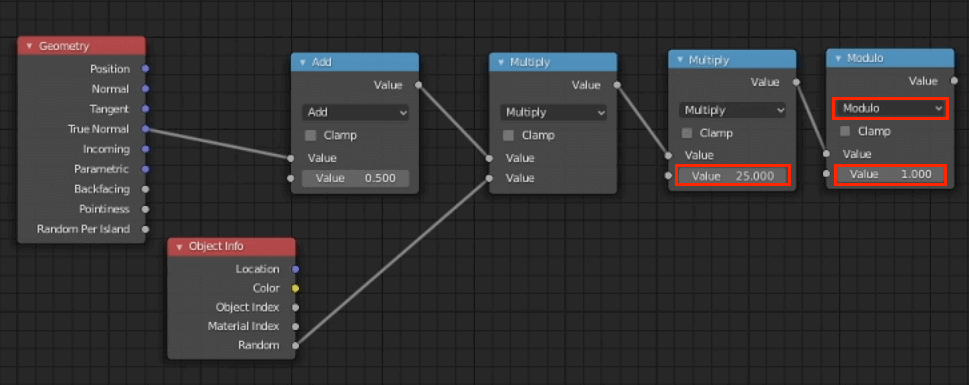
Duplicate the Multiply node once more and set the value to 25. Finally we’ll dubplicate the Multiply node once more but this time we’ll set it to Modulo and the value to 1.0.
SHIFT + A then Converter > ColorRamp. Connect the Modulo math node to the ColorRamp node and ColorRamp output to the Base Color input in the Principled BDSF.
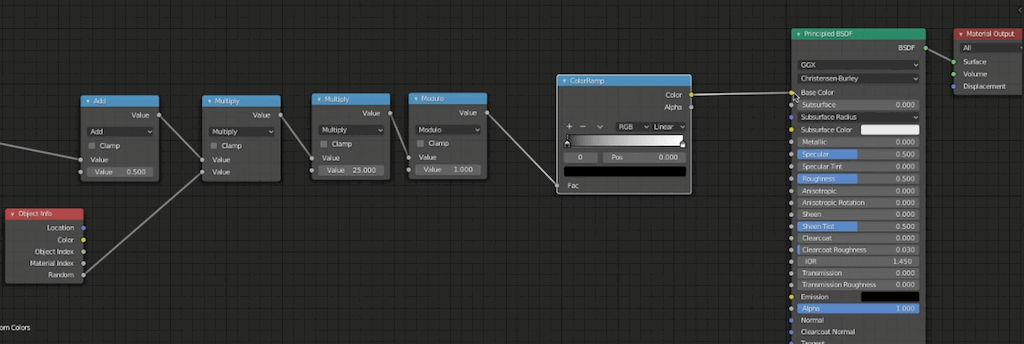
Set your desired color in the ColorRamp node. You can add or remove colors by using the + and – icons. Once you’ve selected your colors, your random color shader is complete.
If you don’t want to have gradient colors present in your shader, you can set the ColorRamp RGB to Constant. This will only render the color that you have chosen in the ColorRamp node. If want to learn how to render wireframes read How To Render Wireframes In Blender EEVEE.